
Recent Updates
Recent Updates
- Jun 5, 2019:
Updated to include support for
terraform v0.12and higher.
In today’s fast paced market, saving time can mean the difference in making a crucial deadline. When utilizing cloud
infrastructure, Nebulaworks strives to produce consistent end results for our clientele. As such, we advocate automating
tasks in day-to-day development and operations. For instance, suppose we have a five node cluster on Google Cloud
Platform (GCP) that serves a public web service made up of multiple microservices. If we want to install a cluster
orchestrator like Kubernetes, we would need to manually run installation commands on each instance. If this were a size
N instance cluster, this quickly becomes monotonus, and prone to errors. Combined with the need for multiple clusters,
the current workflow to configure these instances became every operator’s worst nightmare.
So, how does one achieve automation in a task? The quickest way to get started is by using startup scripts. Startup scripts are exactly like typical bash scripts developers write on a daily basis, with the only difference being they are automatically executed after an instance is created. It is an essential tool for any System Admin/DevOps/Developer to have under their belt.
At Nebulaworks, we achieved automating on-prem solutions by using startup scripts alongside Terraform. Once everything is configured, the only thing we need to do when it comes to deploying infrastructure is:
terraform plan
terraform apply
In this blog post, I will cover how to replicate this workflow in GCP, by installing both Docker and Kubernetes upon
the creation of a Google Compute Engine (GCE) instance.
Requirements
To follow along, you will need to have the following:
- A Google Account to access GCE
- Terraform installed on your local computer
While this blog post is catered to any skill level when using these tools, having prior knowledge of GCE and Terraform will be helpful.
Why Utilize Terraform?
Good question! Since we are going to be focusing on GCE, one may know about the --metadata flag that can be attatched
when using the gcloud CLI. As demonstrated below:
gcloud compute instances create testinstance \
  --image-family ubuntu-1804-lts \
  --image-project ubuntu-os-cloud \
  --metadata-from-file startup-script=<PATH_TO_SCRIPT>
We can quickly spin up an instance that will automatically run a startup script we specify, right out of the box.
However, the downside is that it is not easy to manage our deployment with a large team. What happens when the instance
needs to be resized? How will that be conveyed to the team? Perhaps the instances you created have numerous parameters,
with some resources needing to be created before other resources. Not only will your team have to keep track of a
massive gcloud statement, but it quickly becomes impractical to manage.
Terraform answers to these issues are:
- Emphasizing Infrastructure as Code (IaC), so that it can be organized in popular source control managers, like GitLab.
- Modularity. Terraform’s ever growing library of providers allow it to interact with other infrastructure mediums.
- Simplistic. Terraform files (.tf) are written in HashiCorp Language (HCL), a human readible configuration syntax, making it accessible to individuals of all coding backgrounds.
With those three benefits, Terraform it is a good fit for our use case. However, as like every tool, Terraform is not the only resource you should use to automate your deployments. It is a good start in improving a task, but not the answer to all scenarios. In other words, it is worthwhile to research its strengths and weaknesses moving forward.
Step-By-Step Usage
With the way Terraform is designed, it is extremely straightforward in sharing code that can produce the same outcome, no matter what computer it is run on. In this section, I share snippets of my Terraform code that I have written to help you get going. You can also find this on my GitLab Repository and use that if you desire.
Create a file hierarchy for your project. Mine looks like the following:
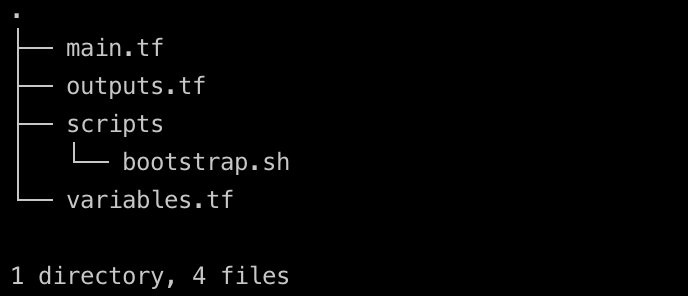
Basic Terraform Hierarchy In general, it is a good idea to separate the scripts that you made for Terraform away from the
.tffiles.If not already done, create a new
.shscript in thescriptsfolder. In our case, the script I will provide here will automatically installdockerandkubectl.bootstrap.sh
#!/bin/bash

# Installing kubectl on an Ubuntu machine
sudo apt-get update && sudo apt-get install -y apt-transport-https
curl -s https://packages.cloud.google.com/apt/doc/apt-key.gpg | sudo apt-key add -
echo "deb https://apt.kubernetes.io/ kubernetes-xenial main" | sudo tee -a /etc/apt/sources.list.d/kubernetes.list
sudo apt-get update
sudo apt-get install -y kubectl

# Installing Docker on an Ubuntu machine
sudo apt install -y docker.io
sudo usermod -aG docker $USER
Create these three
.tffiles and place them in the root directory of the folder you just made.These files are the underline template of how Terraform interacts with outside providers, streamlining their API calls with their HCL language.main.tf
# This is the provider used to spin up the gcloud instance
provider "google" {
  project = var.project_name
  region  = var.region_name
  zone    = var.zone_name
}

# Locks the version of Terraform for this particular use case
terraform {
  required_version = "~>0.12.0"
}

# This creates the google instance
resource "google_compute_instance" "vm_instance" {
  name         = "terraform-instance"
  machine_type = var.machine_size

  boot_disk {
    initialize_params {
      image = var.image_name
    }
  }

  network_interface {
    network       = "default"

    # Associated our public IP address to this instance
    access_config = {
      nat_ip = google_compute_address.static.address
    }
  }

  # We connect to our instance via Terraform and remotely executes our script using SSH
  provisioner "remote-exec" {
    script = var.script_path

    connection {
      type        = "ssh"
      host        = google_compute_address.static.address
      user        = var.username
      private_key = file(var.private_key_path)
    }
  }
}

# We create a public IP address for our google compute instance to utilize
resource "google_compute_address" "static" {
  name = "vm-public-address"
}
How Terraform handles startup scripts in instances is the usage of the
provisionerblock. This allows for Terraform to automatically log into the instance and execute the passed in script. This itself is very powerful and has multiple ways of being used. However, for the sake of this blog, we will only be looking at this type of provisioner.variables.tf
variable "project_name" {
  type        = "string"
  description = "The name of the project to instanciate the instance at."
  default     = "mattyshiro-vaulttraining"
}

variable "region_name" {
  type        = "string"
  description = "The region that this terraform configuration will instanciate at."
  default     = "us-west1"
}

variable "zone_name" {
  type        = "string"
  description = "The zone that this terraform configuration will instanciate at."
  default     = "us-west1-b"
}

variable "machine_size" {
  type        = "string"
  description = "The size that this instance will be."
  default     = "f1-micro"
}

variable "image_name" {
  type        = "string"
  description = "The kind of VM this instance will become"
  default     = "ubuntu-os-cloud/ubuntu-1804-bionic-v20190403"
}

variable "script_path" {
  type        = "string"
  description = "Where is the path to the script locally on the machine?"
}

variable "private_key_path" {
  type        = "string"
  description = "The path to the private key used to connect to the instance"
}

variable "username" {
  type        = "string"
  description = "The name of the user that will be used to remote exec the script"
}
These are all of the variables that will be interpolated in all of the
.tffiles that reference them. For the most part, we can explicitly define our own values into them, but more importantly, we can also pass in an additional file,terraform.tfvars, that will override any of the values that we passed in here.output.tf
output "instance_name" {
  value = "${google_compute_instance.vm_instance.name}"
}
This file will be the resulting output that Terraform will return once it is done applying its work. In this case, we will just return the name of the instance that has been made.
Create a
terraform.tfvarsin the root directory of the project. This will contain variables that are not suitable for SCM, since they often vary in values depending on the system Terraform will be run in. The format of this file looks like the following:terraform.tfvars
# Variables that are dependendent on the user are declared here

script_path = "<SOME_PATH>"

private_key_path = "<SOME_PATH>"

username = "<some_value>"
Once all of the files are in place, export the
GOOGLE_CLOUD_KEYFILE_JSONvariable in your current session, which points to your.jsonfile that contains the google cloud keyfile that your project generated. More information on obtaining this file can be found here.export GOOGLE_CLOUD_KEYFILE_JSON=/path/to/keyfile/on/computerFrom there, you will need to initialize Terraform into your working directory with all of your
.tffiles. Run the following command, which if you were following this blog post up until now, should give you the confirmation that it is good to go.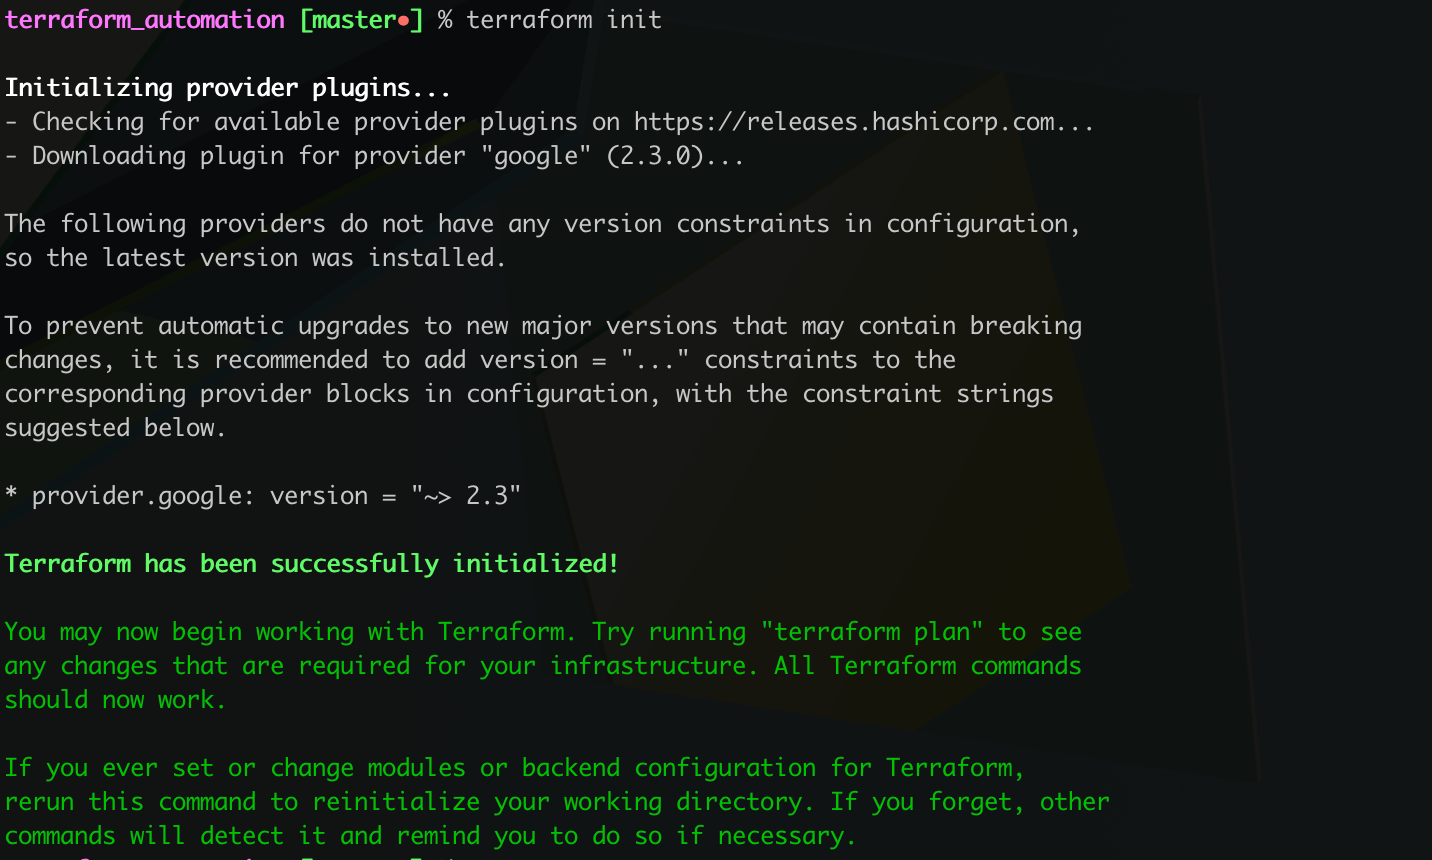
Terraform Init Command Now the fun part. No really. These two commands will not only spin up a single GCE instance, it will also run the script that we made earlier automatically after the instance is done running.
terraform plan
terraform apply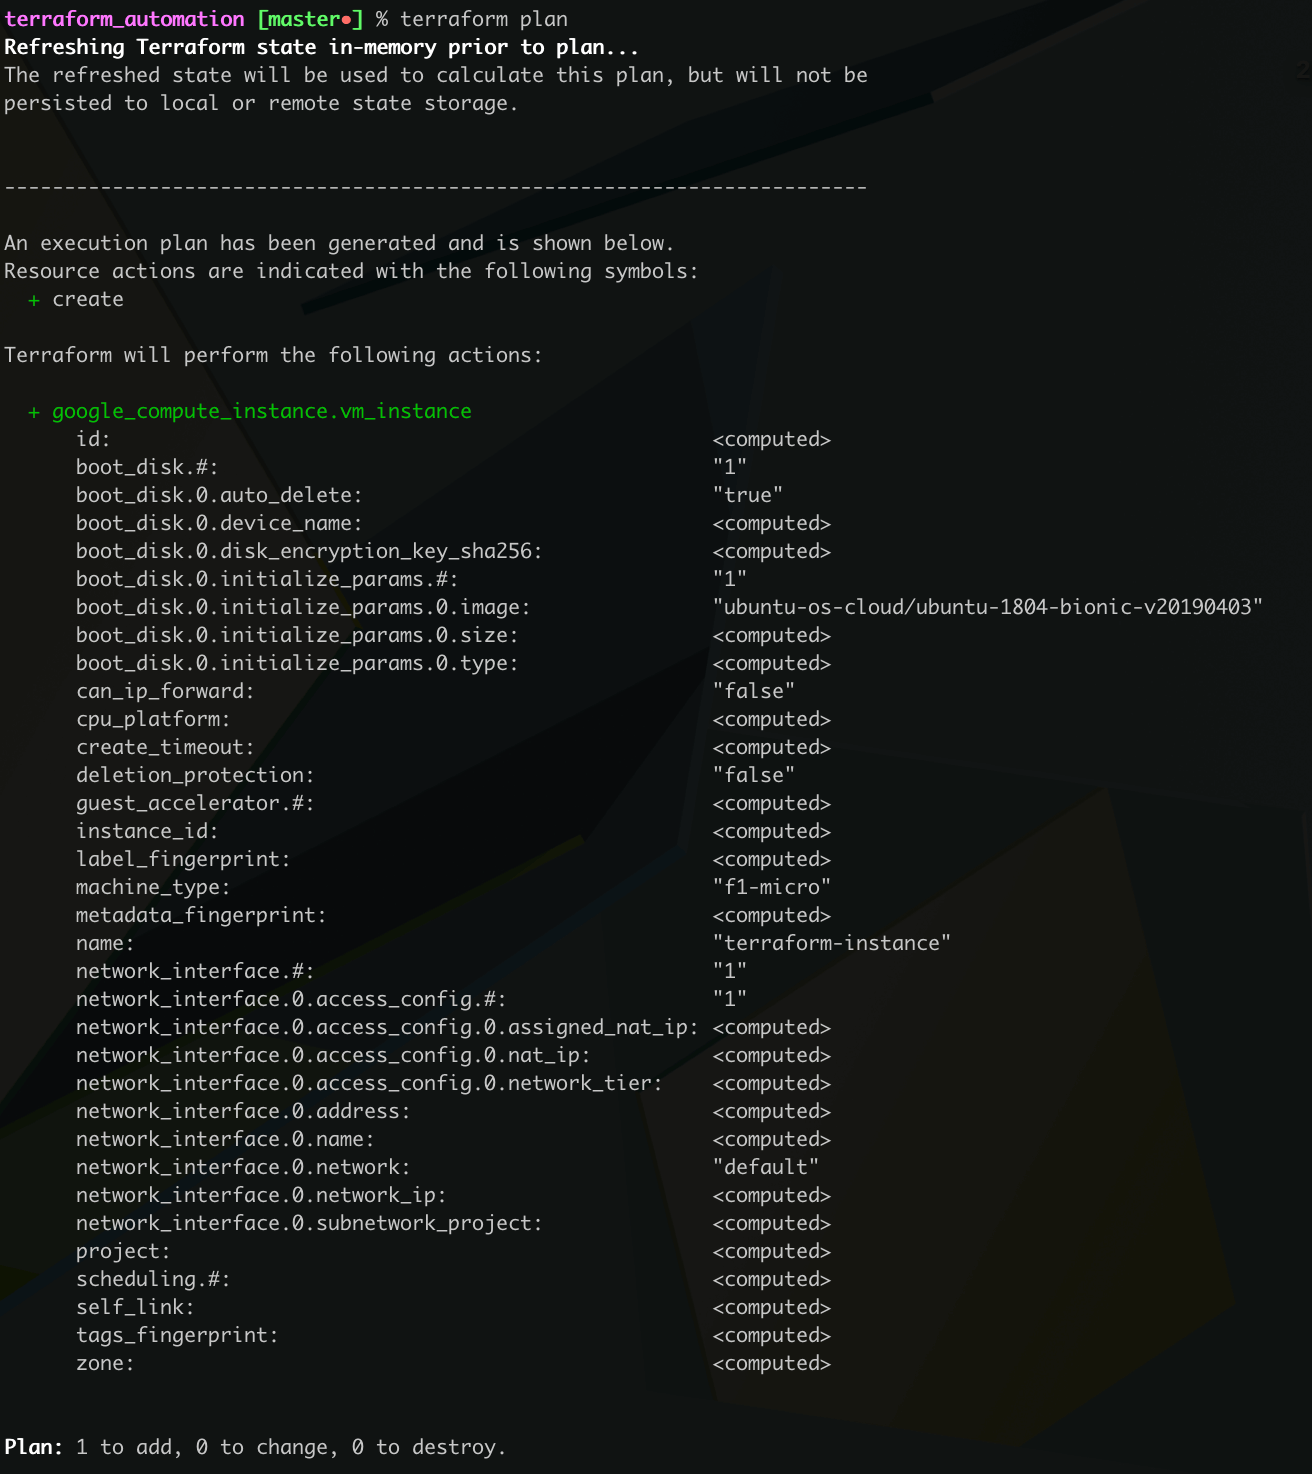
Terraform Plan Results If you do a
gcloud compute ssh ...onto the instance that you made, you can verify if the instance that you made has the specified software.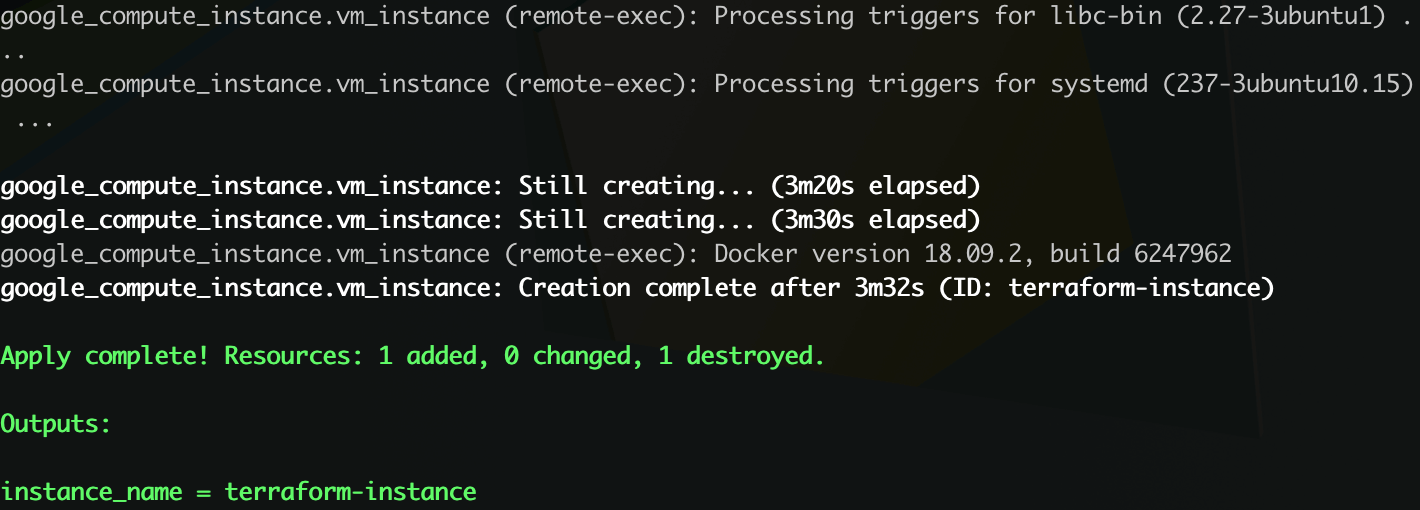
Terraform Output 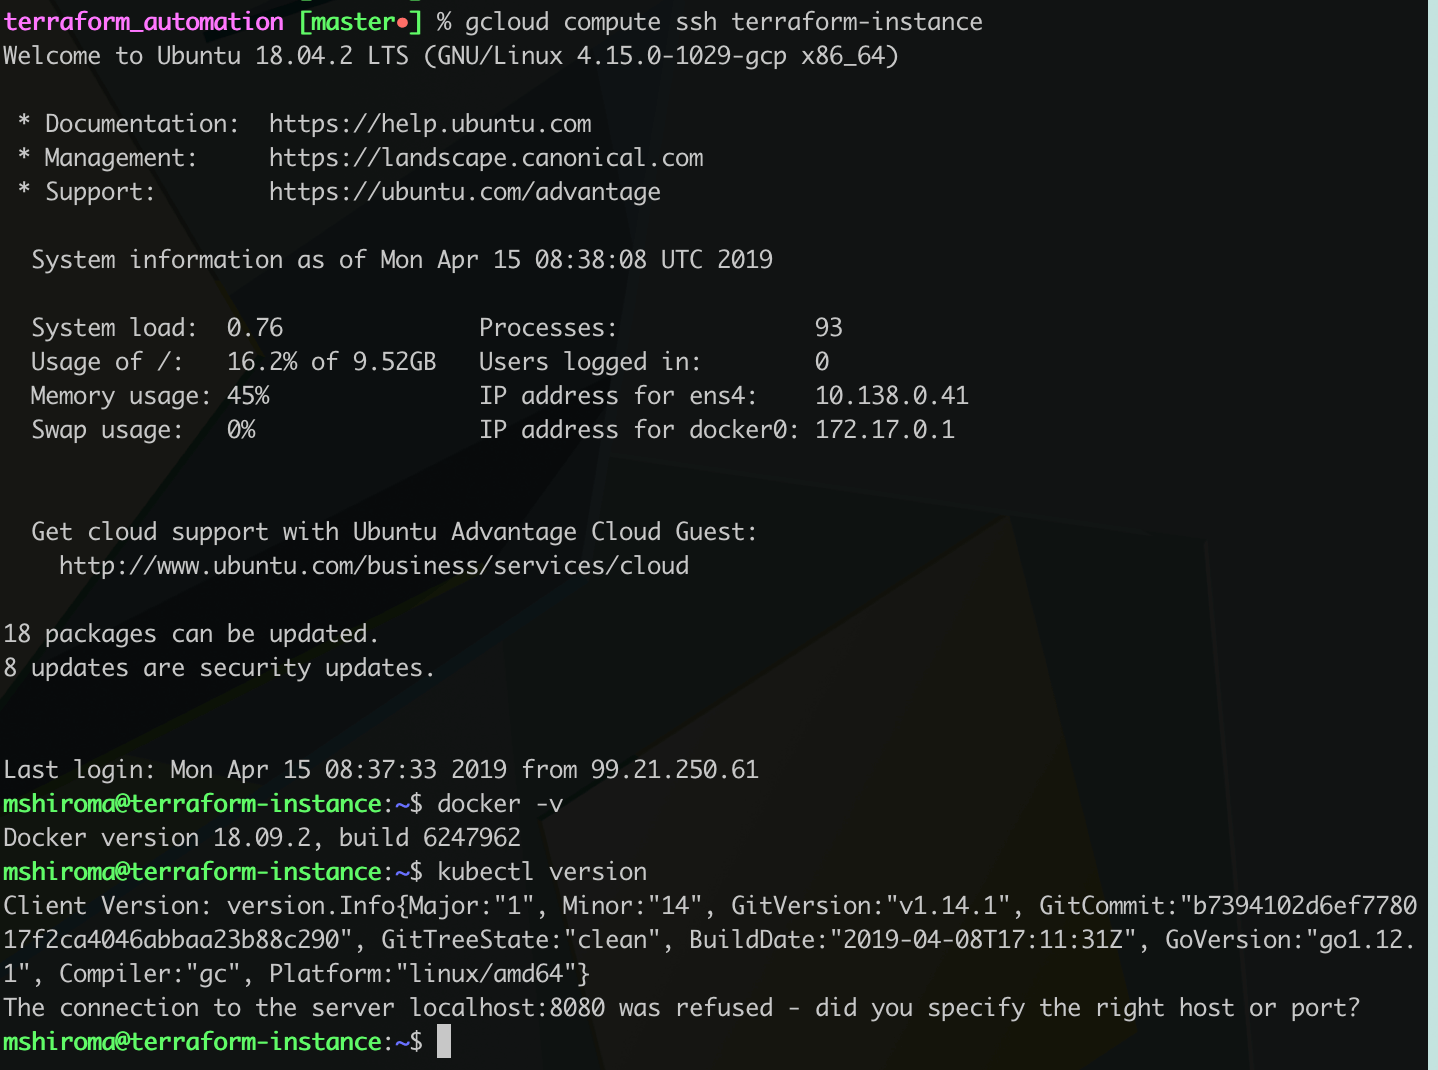
GCE Result
Conclusion
While all of this may seem like a lot of initial headway, in the long run, having a simple way to quickly instantiate instances with preinstalled software will prove its weight in gold. Developing practices like this, in the long run, will improve your workflow and the end results of your application. No longer are the days where you have to linearly run commands in instances; now you can do three simple lines and get some much needed fresh air.
Terraform, as a result, is quickly being adopted by numerous DevOps practitioners due to how powerful the tool can be when it comes to both collaborating and improving existing workflows. To simplify your GCE instance bootstrapping process with Terraform, it is a step in the right direction for introducing workflow automation.
Have you ever used Terraform in quickly deploying ready to be used instances on any Cloud platform? Or are you interested in seeing what other use cases Terraform falls under? If so, feel free to reach out to us.