
Recent Updates
If you are new to the DevOps culture and in search of easy to use automation pipelines for your teams CI, you might want to consider switching to GitLab and its excellent DevOps tools. In this article, we will be setting up GitLab Runners on Google Kubernetes Engine to provide continuous delivery of container images to docker hub.
This blog post is written with the assumptions that you have a CE or EE GitLab server running. If you don’t, set up a Docker or a Kubernetes cluster and deploy this Docker Image for GitLab CE
Requirements
Please consider the following before attempting the instructions this blog post covers.
- GitLab (CE or EE)
- GKE (Google Kubernetes Engine)
- Terraform
- Docker & Dockerfile Image Creation
With each of these topics you should have a beginner to intermediate experience in using and configuring them.
Whats first?
In order to utilize GitLab’s Auto DevOps, you must have GitLab runners to deliver the product from GitLab’s CI side. GitLab runners can be installed on just about anything, see here. One of the best ways to get a Runner setup for gitlab is to set it up on Kubernetes. In this blog post I will cover setting up an autoscaling GKE cluster using Terraform, then connecting your clusters API to your GitLab repository for Auto DevOps to run.
K8s
- Spin up the cluster in one of the fastest, most reliable methods I know how, IaC with Terraform. Below I have some example code you can use to spin up your very own GKE cluster:
provider "google" {
  credentials = "${var.credentials}"
  region      = "${var.region}"
  project     = "${var.gcp_project}"
  zone        = "${var.zone}"
}
resource "google_container_cluster" "primary" {
  name     = "gitlab-cluster"
  initial_node_count = 3

  pod_security_policy_config = {
    enabled = false
  }
}
This code and instructions on how to use it can also be found in this GitLab repo I created.
- Connect our local kubectl command to the expose API from our GKE cluster.
To connect run the following command in your local terminal:
gcloud container clusters get-credentials $(cluster name) --zone $(zone) --project $(Google Cloud Project)
- Verify we have actually setup a new context and connected to our GKE cluster:
kubectl config get-contexts
An asterisk should appear next to the name of the context you are connected to. This should match the values we entered into the first command we entered into our terminal.

Connecting GitLab to our new GKE Cluster
GitLab requires the following to connect your cluster to a GitLab repo.
- Cluster Name (Any name you want to give it)
- API URL
- CA Certificate
- Token
- Namespace
Feel free to enter any desired cluster name. This value is cosmetic and just for GitLab to label the cluster you have setup.
- We need to gather the API URL. Luckily, this is fairly easy to grab. Head back into your local terminal and enter the following command:
kubectl get endpoints --all-namespaces | grep kubernetes | awk '{print $3}'
This should display both the IP and port we will use to connect to our Kubernetes cluster. In the text field enter it
with prefix https://.
In this next section we will need to setup the namespace and service account gitlab will use.
- Lets create a namespace for our service account:
In the context below ns is an abbreviation for namespace.
kubectl create ns gitlab-ns
- We need to set the namespace for our current context so it does not need to be specified each time:
kubectl config set-context $(kubectl config current-context) --namespace=gitlab-ns
- Once in the namespace we will need to create a service account:
In the context below sa is an abbreviation for serviceaccount.
kubectl create sa gitlab-sa
- The service account will be given admin permissions to deploy pods:
kubectl create clusterrolebinding gitlab-cluster-admin-binding --clusterrole=cluster-admin --serviceaccount=gitlab-ns:gitlab-sa
Now that we have created the account and given it the proper permissions we need to grab the certificate authority so GitLab can verify it has connected to the correct Kubernetes cluster.
kubectl -o json get secret $(kubectl get secrets | grep git | awk '{print $1}') | jq -r '.data."ca.crt"' | base64 -D - | tee ca.crt
This CA can be submitted into the CA Certificate field on GitLab.
Lastly, we will describe the service account and ask for the token:
kubectl describe secret $(kubectl describe sa gitlab | grep Tokens| awk '{print $2}')| grep token: | awk '{print $2}'
This command may be a lot for some newer shell users. To summarize our previous steps, we are asking kubectl to describe the Gitlab service account, and search for the line with the phrase ‘Tokens:’. Last, the command awk is being used to parse text from the second column.
From that command we are given the value of the token for that Service Account and enter it into the token field in Gitlab.
Next, we will enter gitlab in the “Project namespace (optional, unique)” field and check the box that says “RBAC-enabled cluster”.
Now that we have finished entering all the required fields, we can select “Add Kubernetes cluster”.
If you are looking to grab all this information quickly, below is a curl for a shell script I wrote that pipes its output to shell. You can enter this command into terminal and it will gather all of the needed information (assuming you have setup your kubectl context). As with any script from the internet, please check it before executing.
curl https://gitlab.com/joshuadcampbell/gitlab-k8s-api/raw/master/K8s_Connect | sh -
Installing Helm and GitLab Runner
Now that our GitLab Repo has been connected to our K8s cluster, we can install Helm which will then be leveraged to install the GitLab Runner.
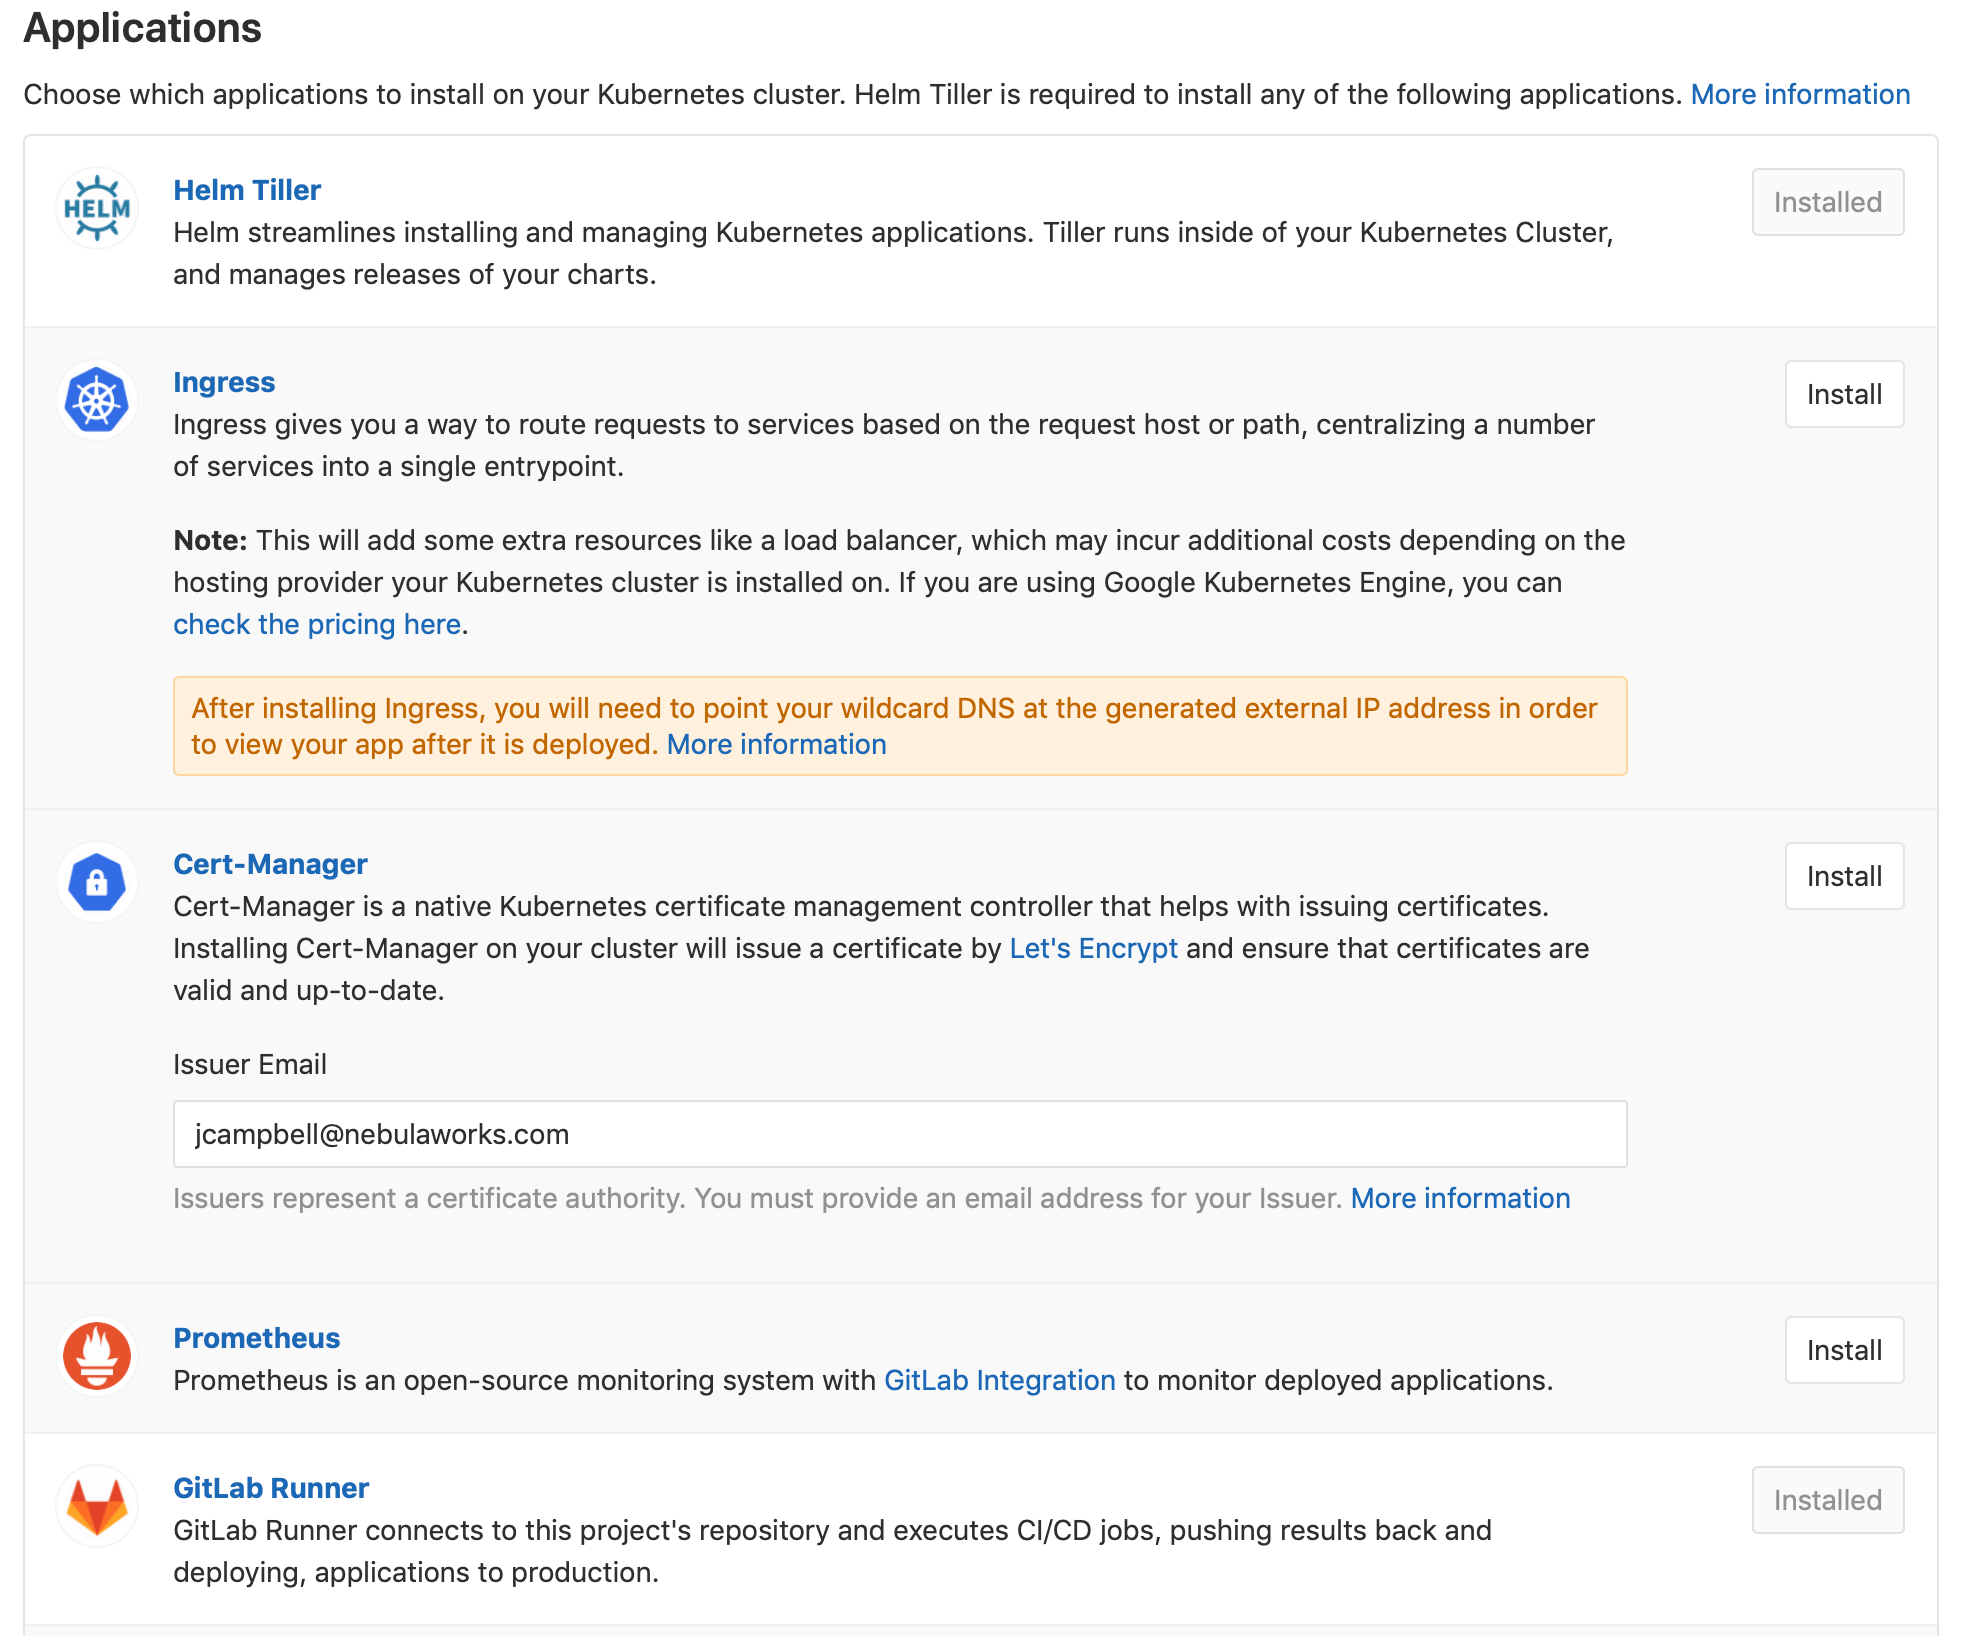
Go ahead and hit the “Install” button next to Helm, followed by hitting the “Install” button next to GitLab Runner.
GitLab will install a Helm Tiller deployment and spin up a GitLab pod in our K8s cluster.
This can be verified by running kubectl get pods --namespace gitlab-managed-apps
You should see two pods similar to the ones below.

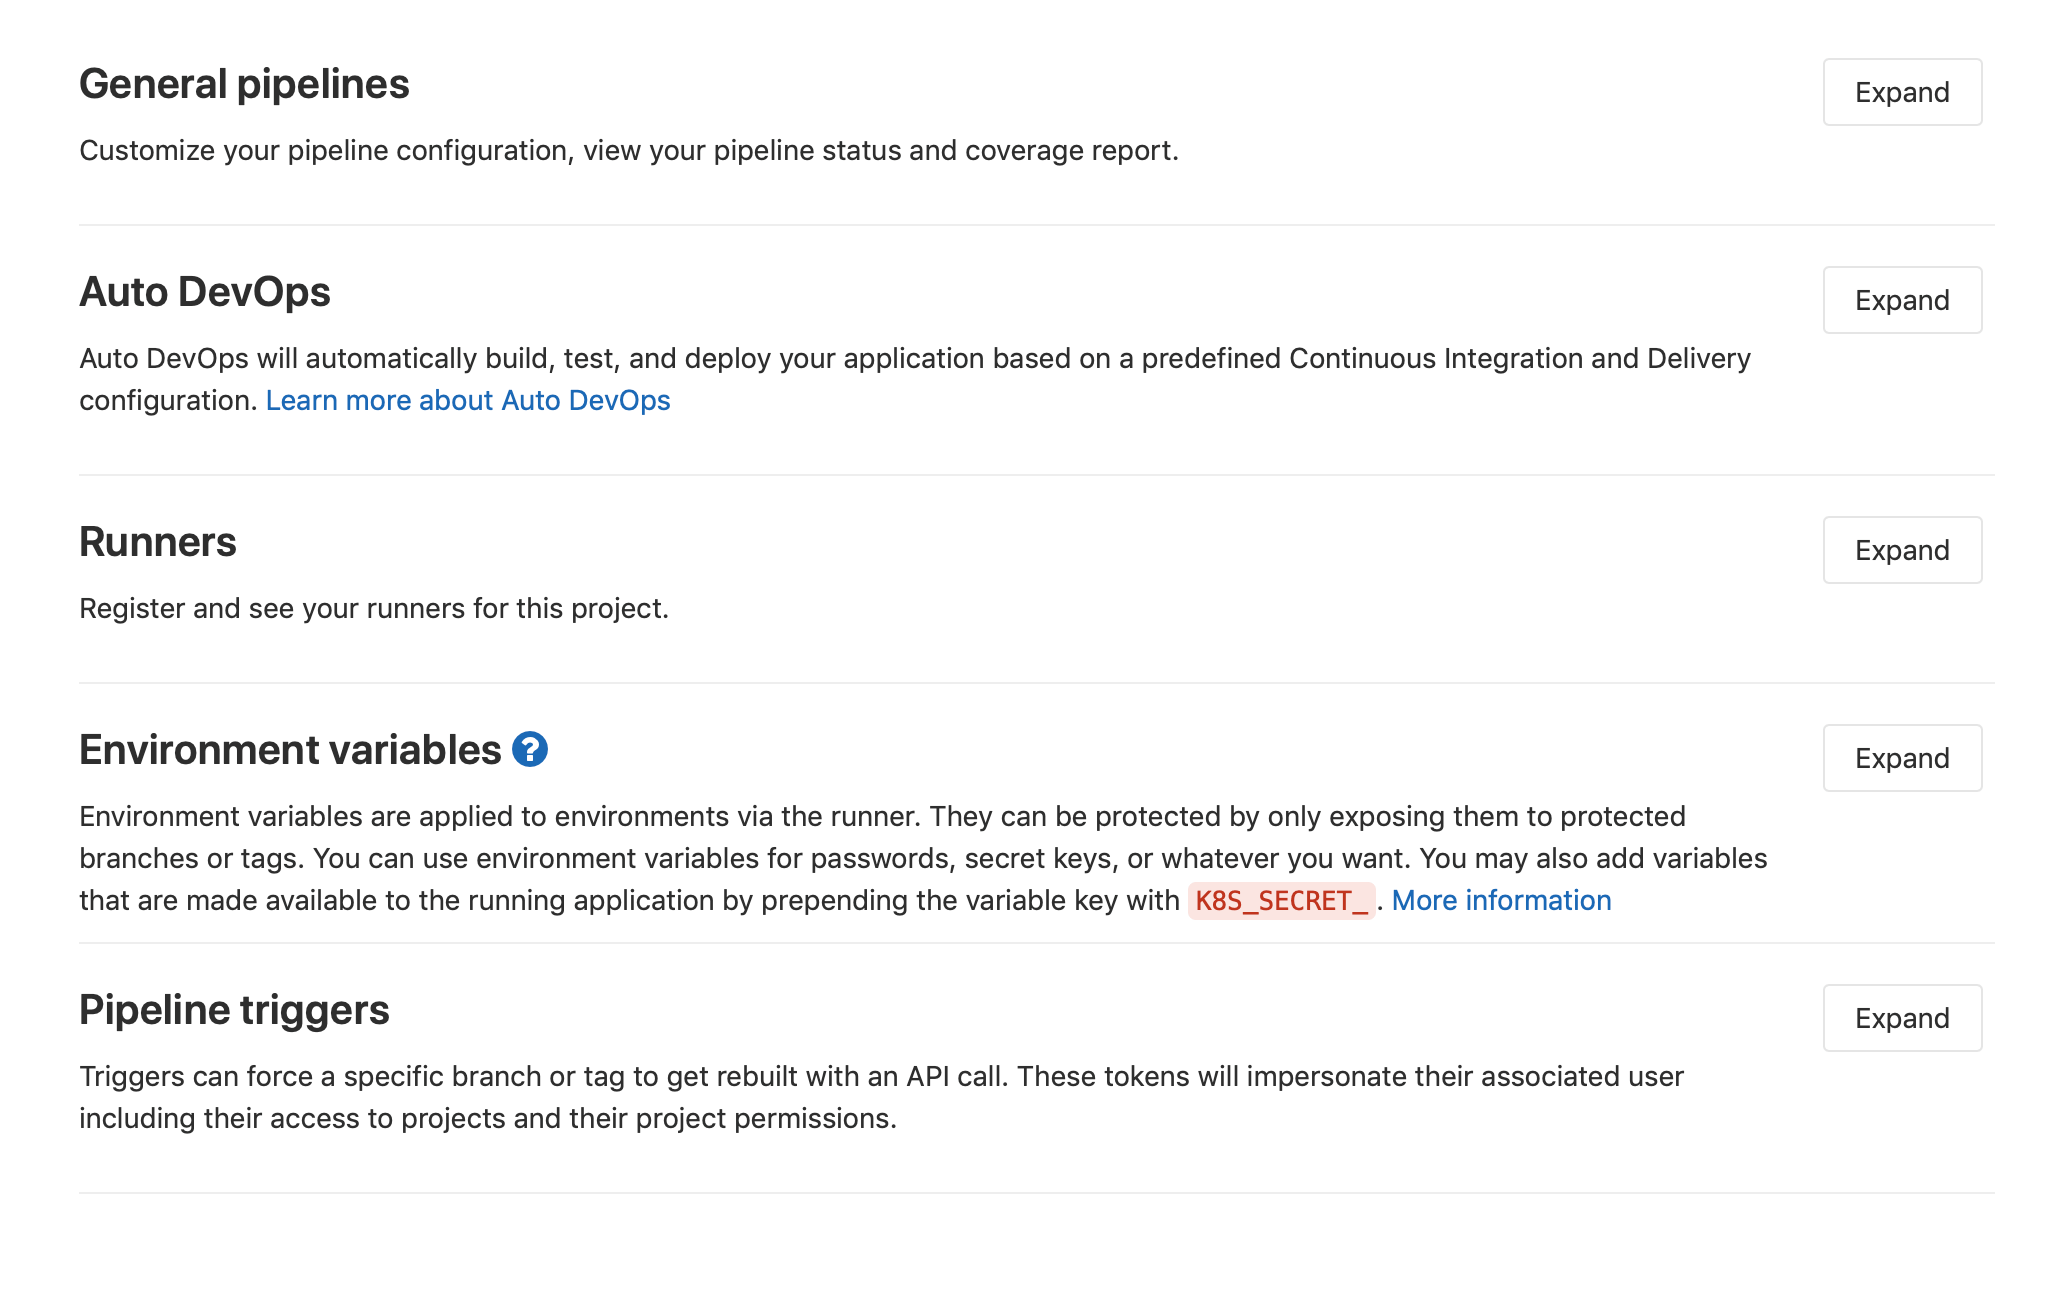
To confirm the runner is active and connected to the our current GitLab repository we can head into Settings -> CI/CD
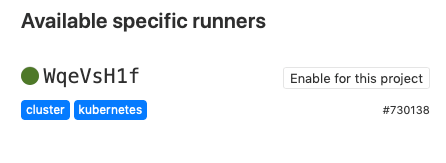
Next, lets expand the Runners window to verify we have a happy runner listed.
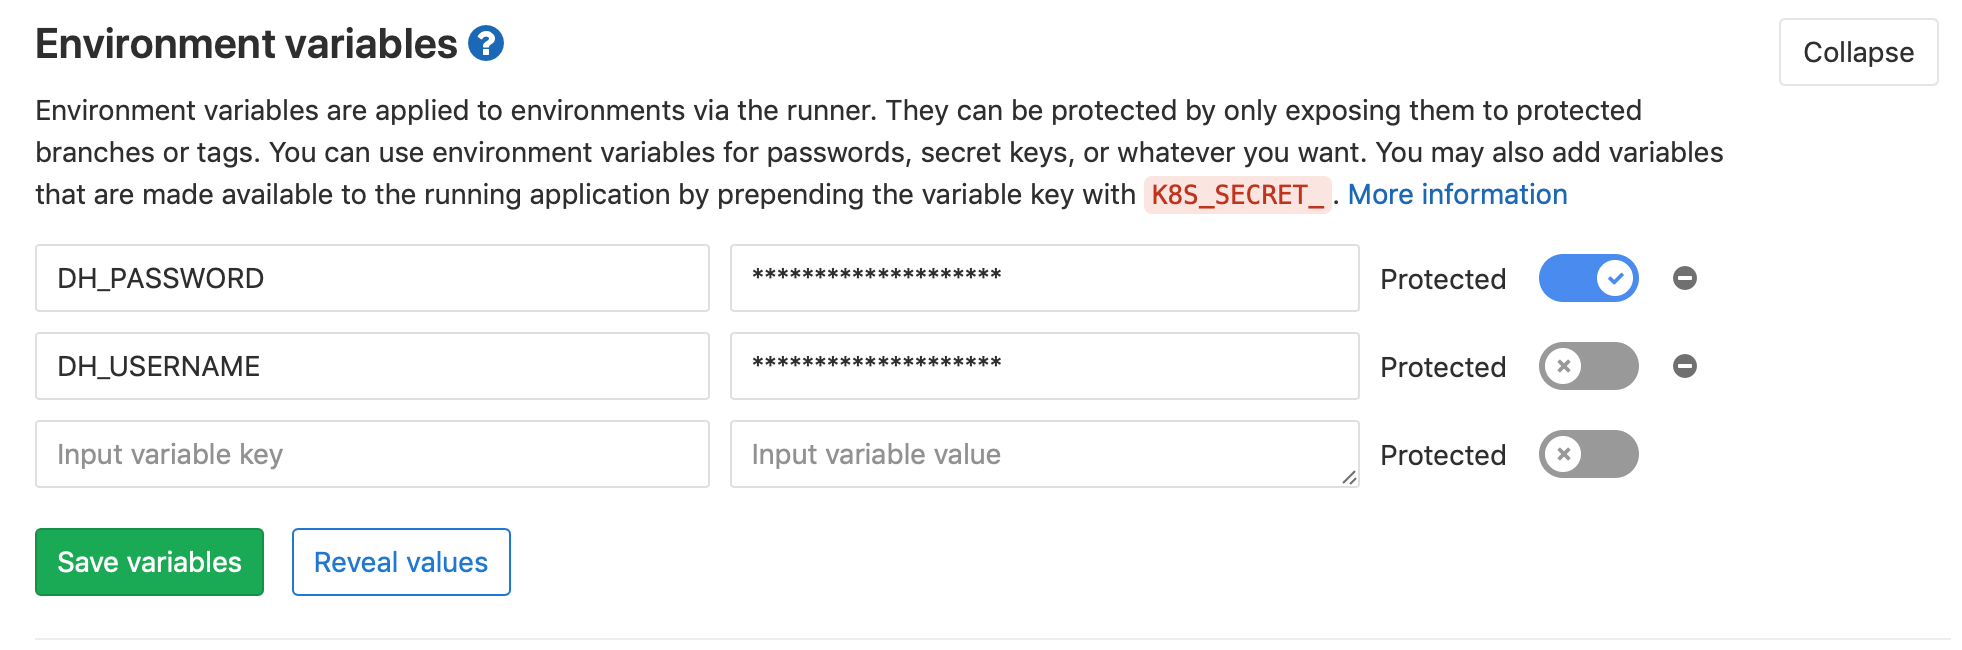
Lastly, we should add our Docker Hub credentials so our Runner has access to them as
environment variables. Head back to the CI/CD Settings and expand the section titled Environment Variables.
Here we can add the username and password for our Docker Hub account.
Pushing our code and giving it a test
Now that we have confirmed our Runner is active and connected to our GitLab repo, we can add the GitLab CI Configuration file and the Dockerfile we desire to build and push to Docker Hub.
.
├── .gitlab-ci.yml
└── Dockerfile
- Here is the GitLab CI Config file I created:
image: docker:latest

services:
  - docker:dind

build_and_push:
  stage: build
  script:
    - echo $CI_JOB_ID
    - echo $DH_PASSWORD | docker login --username $DH_USERNAME --password-stdin
    - docker build -t $DH_USERNAME/gitlabbuild:$CI_JOB_ID .
    - docker push $DH_USERNAME/gitlabbuild:$CI_JOB_ID
- Here is simple Dockerfile example:
FROM apline:latest
MAINTAINER Joshua Campbell "jcampbell@nebulaworks.com"

RUN mkdir test
- Lets push these files and check to see our pipeline and GitLab Runner worked!
Lets head into the Jobs page, CI/CD -> Jobs and check to see if our job passed.

Conclusion
We have all heard the old idiom to ‘not put all of our eggs in one basket,’ but if you haven’t even started putting eggs in baskets, then it sure is an acceptable way to get started. GitLab can get you off on the right foot by following some DevOps best practices. Once you have begun using GitLab for its continuous integration, then the next logical step is to get your master branch delivered on each iteration.
GitLabs tool suite is a no brainer for any teams looking to join the world of continuous delivery.
If you want more information regarding Docker, Kubernetes, CI/CD pipelines or any other tools in the CNCF space, feel free to reach out to us.